Heat Transfer Placement and Position Guide
When printing t-shirts and other apparel, the transfer placement and position is pretty crucial to the success of your finished apparel.
This is a hot topic for apparel decorators and one with many questions.
Well, with this guide, remove any doubt and fear.
Print shirts with confidence that the designs are straight and in the right spot.
Whether you are printing full front designs, left chest logos, sleeve prints, or any other fashion-forward placements, learn all you need to know here in the Transfer Placement and Positioning Guide.
Spoiler alert: if you stick around to the end, you can get a free ebook on heat printing placement. 😉
Loading the T-Shirt Straight on the Heat Press
Before you even get out a single tool or even the heat transfer, one of the most important steps in proper heat transfer alignment is actually loading your t-shirt so that it is straight on the press.
This may seem obvious, but it actually isn’t as obvious in appearance as you may think.
The shirt can appear to be on straight when you look at the collar and the shoulder seams. But don’t forget to check the bottom portion of the shirt as well to make sure that there is even amount of fabric on each side.
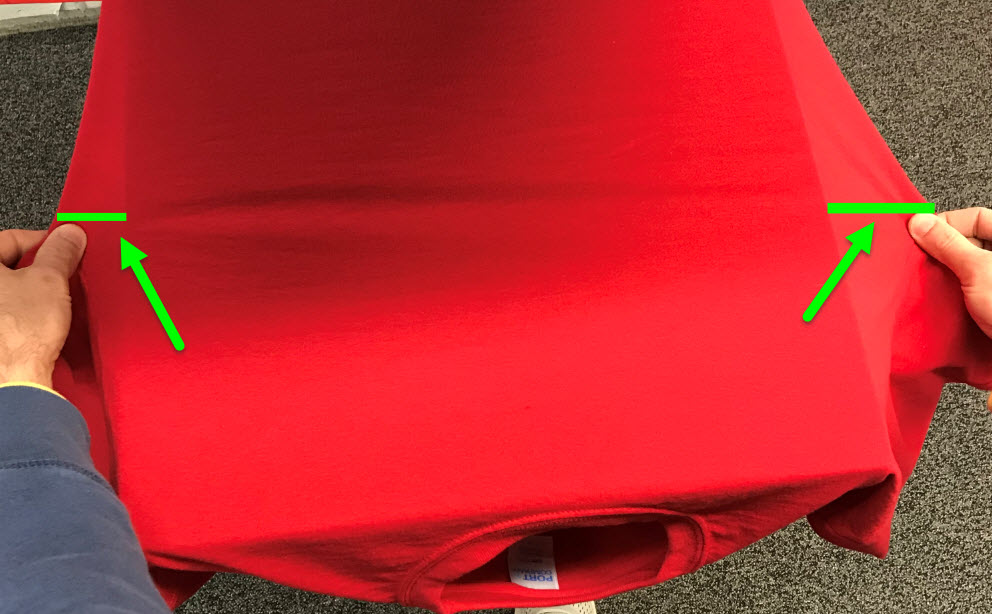
Just because the collar and shoulders are even at the top, doesn’t mean that the bottom is even too, though it will look like it is. So double check both ends of the shirt.

If the shirt is not on straight, no alignment tools in the world will help because you are aligning the transfer straight onto a crooked shirt. In turn, your transfer will end up crooked.
Once you have determined that your shirt is aligned correctly on the press, there are several ways to then position your heat transfer for proper placement.
Use Your Fingers for Transfer Placement
A quick and very popular way to position your t-shirt transfer design is to use the 3 finger rule (or 4, depending on the size of your hand).
Place your full front transfer design 3 fingers down from the collar.
This is fast and easy because you don’t need to pick up any other tools to do this. It’s just a quick placement of your hand and adjust your transfer sheet.
This placement technique will get you pretty close to most industry standard full front center design placements.
It’s not a fail-safe method, but will look good on most sizes with most designs.
Use the Shirt Seams for Transfer Positioning
Using the shirt seam method, you’re going to find your vertical and horizontal centers of your shirt.
Identify the vertical center of your shirt using your collar and draw an imaginary line down the center of your shirt.
Next, find the armpit seams under the sleeves. Draw and imaginary line across the chest of the shirt horizontally. This will be your horizontal center.

Where those 2 lines intersect is the center point for your transfer image.
Like the 3 finger rule, this will work most of the time as well.
However, it’s also not a fail-safe method of transfer positioning.
While it gives you a great starting point, you’ll sometimes need to make some adjustments depending on the size of your design. For instance, on a very narrow, horizontal design, you may need to push it up slightly.
On a design that is taller vertically, you’ll need to push the transfer down, as can be seen in this example.

After finding your center point using the t-shirt seams, you can always make adjustments by what will look good for the particular design.
Use a Transfer Positioning Tool
There are lots of tools out on the market that will assist you in lining up your transfers.
Though these tools are not required, many apparel decorators feel comforted having these tools.
I am (and will always be) a big proponent in just eyeballing it with one of the methods above.
But if you are one to use tools, we’ll cover a few here.
Ruler
The first is a good old trusty ruler. This is something that you probably already have and can use it to ensure a good transfer placement.

Using a ruler, you’ll go 1.5 – 3 inches down from the collar, depending on the shirt size.
For an adult size shirt, 3 inches down will be about that 3-4 fingers from the collar.
Collar Cutout Guide
Another tool you can try is a placement guide cutout. These are available in packs that come with several sizes, ranging from adult, youth, toddler, to infant.
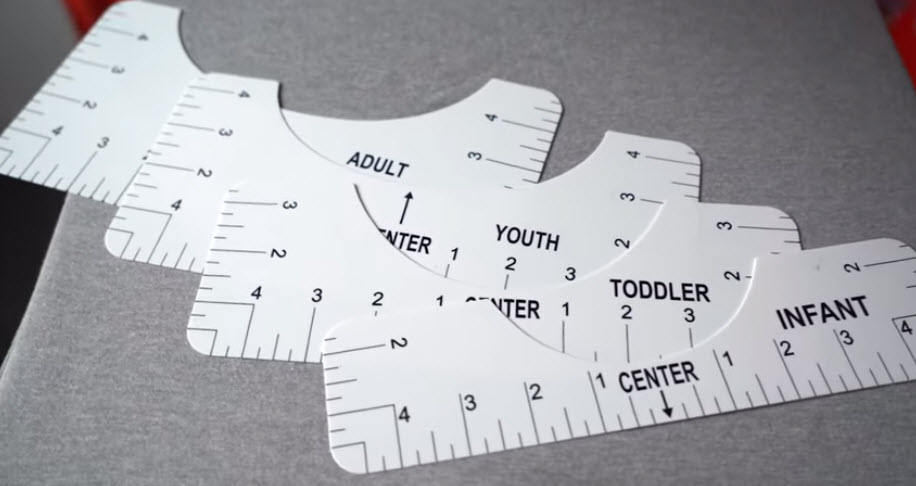
All you do is place the guide around the collar for the appropriate size shirt, and then touch the transfer to the edge of the cutout guide.

Now, keep in mind that you will want to make some adjustments depending on where your image actually starts on the transfer sheet.
If there is a large space between the top of the paper and the top of your design, you’ll want to compensate for that and start the design at the guide.
That goes for any of the placement methods, really.
Laser Alignment System
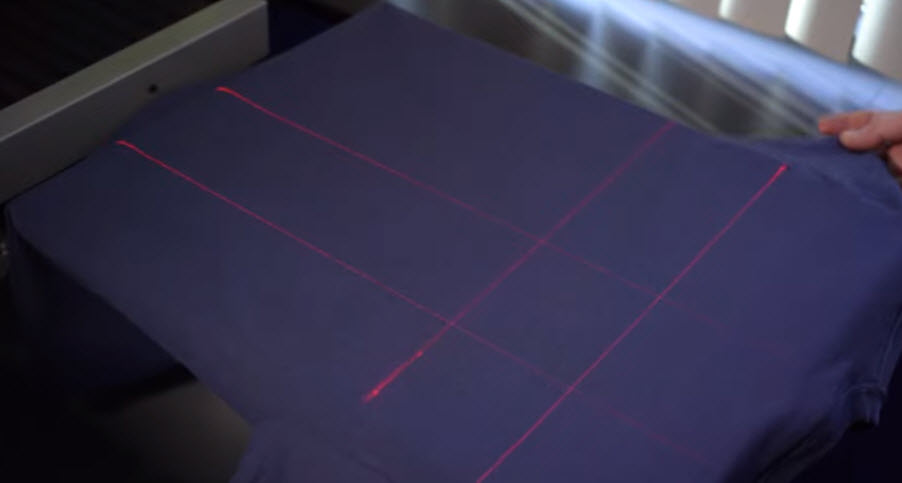
Another tool we’ll show you is the Laser Alignment System.
This is a set of lasers that will actually project lines on the areas you choose right on your platen.
It comes with a Laser Alignment Wizard that helps you line up the lasers for particular positioning, such as a full front design, a left chest, etc.

Once you have your lasers aligned for your particular job, you just need to load your shirt onto the press each time in the same place and you’ll be all set.
These tools can take out the guesswork when you are pressing.
But as you press larger runs of shirts, they can slow you down if you are measuring and aligning each and every shirt, especially depending on the tool you are using.
Which is another reason why I prefer to just “eyeball” it.
However, if you’re just starting out, these tools can help you know where to begin. Then as you press more and more, you can take off the “training wheels”.
You’ll have a better idea where it goes after you press a few.
[Related Content: Comparing Transfer Positioning Tools]
Design Positioning
Generally speaking, there are some guidelines you’ll want to follow for good-looking design placements.
So far, we’ve been showing a lot of full front designs.
Here are some tips for other design placements.
[Related Content: Tips for Positioning Heat Transfers on a V-Neck Shirt]
Left Chest Positioning
Left chest designs are also very popular on t-shirts, hoodies, and polo shirts. This design placement is very intimidating among apparel decorators when trying to figure out where to place the design.
Don’t be intimidated!
As long as you follow the same set of guidelines, you’ll be a printing pro.
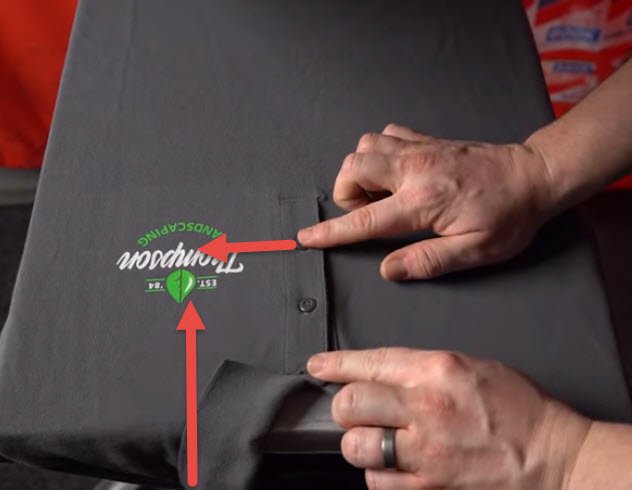
In the case of left chest, instead of using the middle of the collar as your center, just use the side of the collar as your new center.
Usually with left chest positioning, since the designs are much smaller, you’ll want to slide the design up vertically so it is above the armpit seam.
With polo shirts, use the bottom button as your horizontal center.
[Related Content: Left Chest Shirt Printing Placement]
Back of Hoodies
The back of hoodies can also be a tricky place to print. This is because of the placement of the hood and how it can either be worn up or down. This changes the amount of visibility of the back area.
As long as you keep the design a little further down than usual, it should be fine. Instead of 3”, start the design at about 5 – 6” down, as a rough rule of thumb.
![]()
Of course, like any of the other positioning tips, always make adjustments based on the design itself and the sizing.
For instance, when adding a name to the back of a hoodie, you’ll want to place the name further down than you normally would on the back of a shirt, so the hood doesn’t cover the name up completely.
[Related Content: Placement Tips for Printing the Back of Hoodies]
Short Sleeve Prints
Most shirts will have a crease mark down the center of the sleeve. This makes aligning sleeve prints super easy.
If not the crease, you can also line up the shoulder seam to use as a guide as well, for centering sleeve graphics.
Then, typically a short sleeve print will be placed 1-2 fingers up from the cuff.

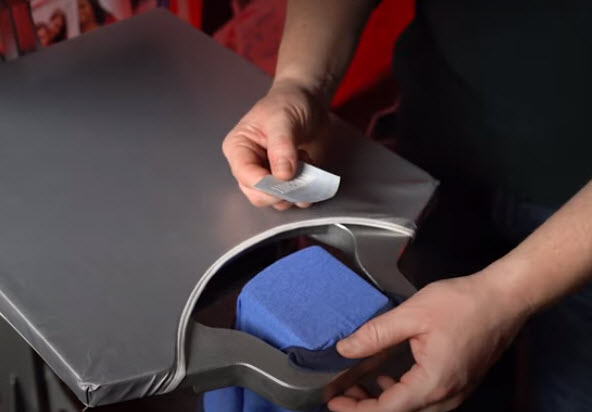
The key to sleeve prints is to make sure you get that nice flat surface to print on. If you are using a normal size t-shirt platen on your heat press, then you’ll want to use a Print Perfect Pad or a mouse pad to raise the print area.
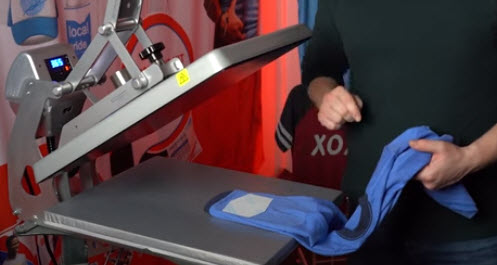
A cap press makes printing a sleeve easy. Just slide the sleeve over the platen and place your transfer like you normally would.

Lastly, the Tag Along™ HP platen also makes printing short sleeve prints a breeze. It’s another great use that can really help speed up your production time so you don’t have to slide a mouse pad into the sleeve each time.
[Related Content: Brand Your T-Shirts with a Shirt Tag]
Using the Grid Lines
Now that you know all of the places to position your transfers on the apparel, getting the plastisol transfer placement centered and straight on your shirt is the next important part of the application process.
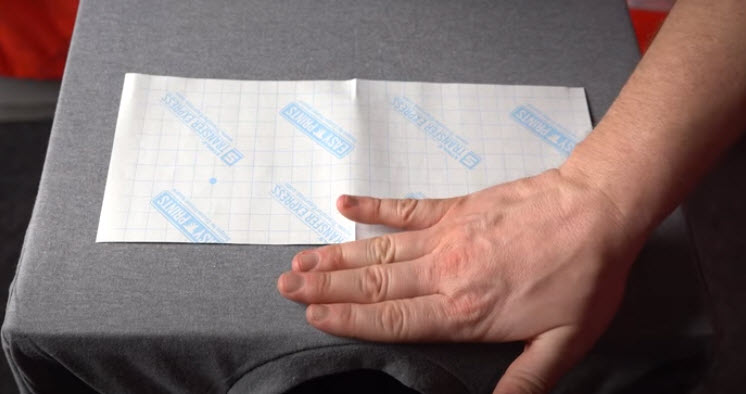
Our best selling Goof Proof screen printed transfers and Hot Split Retro screen printed transfers are both back printed with a grid pattern to help make this step easier.

All you need to do is to put the release paper ink down on your apparel and position the center of the paper where you would like the center of the print to be on your shirt. Then be sure the horizontal and vertical grid lines are in position and press.
Just like cross hairs, the grid line gives you an easy visualization of how and where the transfer should be positioned.
The grid lines are also beneficial when you are applying large legs or split fronts where you need to cut the paper for application, the grid lines give you an easy tool for lining your two halves back up.
Use Your Eyes
When in doubt, trust in your eyes.
Once you have experience printing shirts, you’ll be able to put all of those extra tools away and just be confident in looking at the placement of the transfers.
You’ll be able to visually see your seams quickly, look at where the actual design is located on the sheet, and place that transfer paper onto the shirt and be able to see if it’s straight.
This will allow you to move quickly and print the most shirts in a given time period.
Positioning transfers isn’t complicated as long as you know and follow the guidelines. Over time, you’ll be a printing pro and positioning your designs will come second nature to you.
The placement of your design is not an exact science. As long as it looks good, you’ll do just fine!
As a final tip, each t-shirt design placement doesn’t have to exactly match the next shirt.
If the placement varies by a ¼” from one to the next, it’s not going to be noticeable when being worn.
Nobody is going to be out there with a ruler measuring if the prints are all in the same exact spot. 😉
Get the Free Placement and Positioning Ebook
If you found this post helpful on heat printing placement and positioning, you’ll love our free ebook on the topic: Logo Anything: Heat Printing Placement Guide.

You can download it here!