The Complete Guide to Image File Types
It is easy to get confused on which type of file to use and send when you want to get a piece of artwork printed as a screen printed or digital transfer to heat apply with a heat press.
There are so many different file types out there – which one do you need to use?
But don’t worry…
It can be confusing, but we make it easy to send files for printing.
First of all, we accept 11 different file types.
So the good news is…
Most likely, your artwork can be used!
[Related Content: How to Upload Artwork for Custom Heat Applied Transfers]
However, we may have to use your file to re-draw your artwork for you so that it is print-ready.
More good news…
There are no art charges. We will re-draw your artwork for no extra cost to you. Our professional artists on staff will make your artwork ready to print as a screen printed or digital heat transfer.
This also means that the artwork may look slightly different in order to get it ready for print.
You can always order a proof if you choose to.
However, sending us the best file you can will definitely help your heat applied transfer image be the best it can be and how you expect it to look.
Sending the best file you can involves knowing the various file types.
To learn more about the different file types, you’ve come to the right place.
Vector vs Raster – what are they and what is the difference?
There are two main types of images that most file types will fall into – vector or raster.
Raster images are more common to come across. They are your popular photo files – jpg, png, gif, tif, etc.
Vector files are not as common. Vector files are usually created by artists or designers. They are typically for logos or for commercial printing purposes, to name a few examples.
Common vector file types are ai, cdr, eps, and pdf. (These files can actually contain raster art also, so it can be tricky – more on this later.)
The difference between these file types is how the art is created within these different types; how the artwork is built.
Raster images are made up of pixels, or tiny squares of colors. That’s it. You’ve seen images like this before.

When zoomed in on raster artwork, you can see the pixels that create the image.
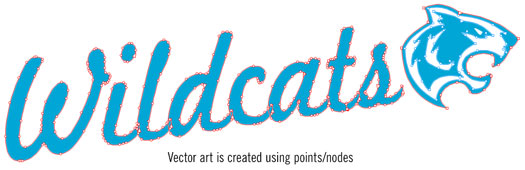
Vector art, on the other hand, is made up of “points” or “nodes” that create lines. This type of art can create smooth curves without “blocks” like raster art.

When zoomed in on vector artwork, lines and curves are smooth.
This brings us to the next part – resolution.
Image Resolution – What is it?
Image resolution plays a part in each type of art file, whether it is raster or vector.
Resolution is basically the quality of the image – how clear or blurry the image is. The higher the resolution, the more clear the image will look.
Resolution is measured by “dpi”, meaning dots per inch (or ppi – pixels per inch). This is measured in a linear inch.
For example, going back to raster art and pixels, the images are made up of the tiny boxes of colors. The boxes (pixels) are in rows upon rows, like a grid.
![]()
Therefore, we can count how many of these pixels are in one inch, and that makes up the resolution. The more pixels there are in an inch, the higher the resolution is and the higher the quality of the image.
The image will have more detail with more pixels. As the pixels per inch increases, the size of each pixel decreases, making it smaller. This helps to create more smooth lines that are less jagged.
That’s why a higher resolution will yield a better looking image.
Photos and images for print are usually a minimum of 300 dpi. When printing, it is usually measured in “dpi” (dots per inch) because that is how the printer adds ink – in dots. If you look under a microscope, or a printer’s loop, you will see these dots of ink.
In order to get high quality prints, the resolution needs to be high.
On the other hand, when you look at an image on a screen like a computer monitor, tablet, or phone, these images are low resolution. The standard for these types of images, especially for the internet, is only 72 pixels per inch.
This is because how the screens are created to display images. Also, for the internet, you want faster load times for images, which requires a smaller file size. A lower resolution can provide that smaller file.
Since vector art is not limited to pixels, it is much easier to have a high resolution file. The art is created with points and lines, with mathematical equations behind the scenes. It is easy to change the resolution.
Changing the resolution with raster art, though, can be more difficult. Going from a high resolution raster image (300 dpi) to a low resolution (72 dpi) is no problem. During the conversion, the program will remove pixels.
However, going from a low resolution image and trying to convert it to high resolution is very difficult, if not impossible. In this case, it will be a very blurry, “pixelated” image.
This is because the raster image only has so many pixels of “data”. As we talked about before, each pixel is a different color.
If you try to add more pixels, they will be the same colors as their surrounding pixels. This just makes the image appear blurry. A true high resolution image will have many different pixels of colors around each other to give that high detail look. It creates those gradients and shading of the image.
If the data or pixels weren’t initially there, the program can’t just make more pixels of these various colors. It just duplicates what is already there, and therefore, doesn’t add any detail to the image. It just makes it a larger, more blurry image.
It is very important to save your raster file at the size that you intend it to be with the desired resolution.
For example, if you want to print your image at 9 inches wide, it needs to be high resolution (300 dpi) at the 9 inch size.
If you try to take an image, which is high resolution (300 dpi) at 3 inches wide, and try to make that same image 9 inches wide, the resolution will drop to 100 dpi, and no longer be a high resolution image.
300 pixels per inch at 3 inches wide = 900 pixels
Take that same 900 pixels and increase the inches from 3 to 9:
900 pixels now at 9 inches wide = 100 pixels per inch
So if you are creating raster artwork for print, make sure you are creating it at the final size in high resolution.
Since vector artwork is not limited to pixels and is created with points/nodes, it can be resized to any size with no problem.
How to Make Raster Art or Vector Art
You may be thinking at this point, “ok, now I know the differences of raster and vector art, but how do I create each of them?”
The answer to this question lies in the art program or application that you are using. Some programs are designed to create vector art such as Adobe Illustrator and CorelDRAW.
These types of programs are great for creating vector artwork. Once your vector art is created, you can save the file as ai, cdr, eps, or pdf to keep the artwork as vector.
However, if you save your vector art in a raster file type such as jpg or png, your art will be converted to raster and will be displayed as pixels.
So it is a combination of how the artwork was created initially, in “pixels” or in “points/nodes”, and also the file format that the file was saved as.
Both of those are equally important in knowing if you are creating a vector or raster file.
Some artwork will always be raster, such as photos. Actual photographs from digital cameras or your phone, are created using pixels.
For this reason, it is important to know how the artwork was created, and not just the file type that it is saved as.
For example, a file type that typically contains vector art can very well contain raster art. Adobe Illustrator and CorelDraw can easily open raster images. Just because you save these raster images as an ai, cdr, eps, or pdf file does not make the artwork inside the file vector art.
Instead, the actual artwork first needs to be converted to vector before it is saved as a vector file format.
The same goes for many other programs. You can save files from Microsoft Word, PowerPoint, etc as a pdf file, but that does not mean that the artwork within that file is actually vector.
So, again, you have to know how the artwork was initially created first – either as vector or raster.
Converting Artwork to Vector or Raster
Generally speaking, all vector artwork can be converted to raster, and almost any raster artwork can be converted to vector. Again, that is a very general statement.
Vector artwork can be saved as raster with almost no problem. It is simply saving it in a file format such as tif, jpg, png, etc. You can also choose to “rasterize” the actual artwork within the program if needed.
The difference is that when a raster image, such as a photograph, is converted to vector, it can take *much* more work to get it to look like a photograph still. In most cases, when a photograph is converted to vector, it will look much, much different. As a quick example, it may look like a cartoon image.

With more work, you could create gradients, shading, etc. to make it look more photo-realistic, but at this point, it is more like a work of art rather than “converting” a file.
In order to convert raster to vector, you would do this in vector programs such as Illustrator or Corel. There is an option to “trace” the image and the program will do its best to re-create the raster image.
If the raster image is simple, it can do it with no problem and may look exactly the same, such as a logo. However, as we just mentioned above, in cases such as a photograph, it is done with a much higher degree of difficulty and will probably not look the same.
![]()
Color mode
Color mode also helps make up the different file formats. Raster and vector images can be created in several different “color modes”. The most common color modes are RGB, CMYK, and spot color.
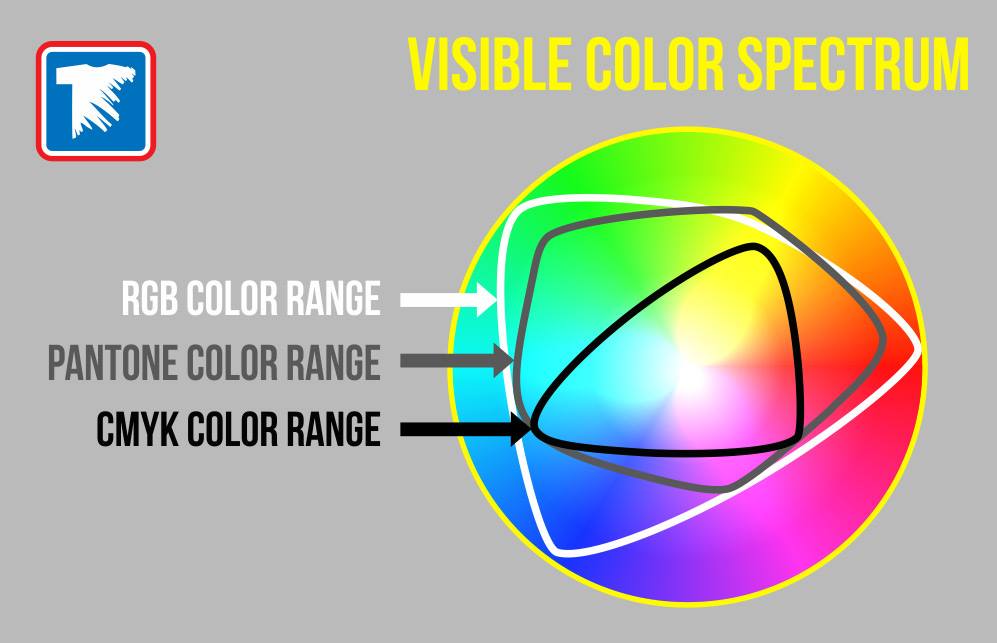
RGB stands for red, green, blue. In this color mode, the entire image is made up of these three colors.
CMYK stands for cyan, magenta, yellow, and key (or black). In this color mode, the entire image is made up of these 4 colors.
A lot of different file types will support the various color modes.
We won’t get into color mode in too much detail here in this post, but RGB is the color mode for electronic screens, while CMYK is for printing. Spot color is used during printing as well, in a different way.
The important thing to take away from this section though, is to know what purpose your image is intended for.
If your image is for full color, process printing, put it in CMYK. If it is an image for your website, put it in RGB. If it is an image for screen printing, spot color is best.
[Related Content: What’s the Difference Between RGB, CMYK, and PMS Colors?]
Best File Types for Printing Heat Applied Transfers
The best file to use for heat applied transfers depends on the type of heat transfer you will be using.
If you are getting screen printed transfers, a high resolution vector file in spot color is the best and will yield the best results.
In fact, it needs to be in vector, so if you supply us a file for screen printed transfers that is rasterized, we will need to redraw the artwork as vector.
If you are getting full color digital transfers, a high resolution file is needed, either in vector or raster. The key is to make sure it is in CMYK.
[Related Content: What Happens to Artwork When Converting Colors]
In any situation, always send us the best file you have to make sure your heat transfers are the quality image that you expect.
If you found this guide helpful, download our one page cheat sheet guide for image file types.