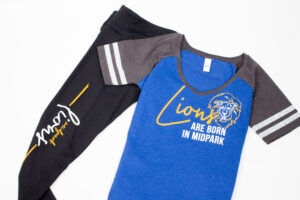
How To Print on Sweatpants and Leggings
The spring athletic season is starting making sweatpants and leggings a popular item to heat print using your heat press.
Creating Your Art
We have over 100 leg design layouts ready to customize in Easy View, our online designer. The most popular is the traditional vertical letter stack but be creative and try one of the other designs.
Best Selling Leg Layouts
- QLG-1
- QLG-87
- QLG-41

A standard leg print is 2.5 x 14” But you can also do large legs 28” tall with a screen printed transfer or 22” with an UltraColor transfer. If you are doing a large leg you might want to keep the maximum size the size of your heat press or you will end up doing two presses. With a screen printed large leg you will cut the paper and position the two halves to get the large print size.
Choosing Your Formula
The what to use when chart is the basis for which transfer type will work best. The choice is based on how many you will need and how many colors are in the print. You can order as few as just 1 of UltraColor Max. When you start getting into a quantity of about 18 you have some less expensive options. If doing 1-2 print colors and applying to cotton or poly/cotton, choose our bestselling screen printed transfer Goof Proof. These plastisol transfers apply in just 4 seconds. If you have a 1-2 color print and will be applying to 100% polyester, Elasti Prints will be your best choice.

For spandex leggings, UltraColor Max is a great choice no matter how many you are printing.

Applying the Leg Print
If you have an interchangeable leg platen, leg application is a breeze. But if you don’t, you can still easily apply a leg print. First decide if you want the print in the front of the pant areas or the side. Also decide if you want it to be at from thigh to knee, or from knee to ankle. Or for a large leg print down the entire pant leg.
Lay your pant on your press making sure pockets and seams are off the press. If going down the side of the pant a leg sized silicone pad is just the accessory to make application easier and keep that seam on the other side of the print area off the platen
Your time, temperature and pressure setting should be what was shown on the application directions provided with your order based on transfer type.
Learn more by watching this video.
Happy Pressing!
