So you’re new to heat printing and just bought a heat press? Congratulations! You just took the first step to starting your own t-shirt business. The next step is to actually get it out of the box and use it.
You would be surprised how many people buy a heat press but are too scared to actually give it a try. That stops today. This post will guide you through how to set up your new t-shirt heat press. We will be using the Hotronix® Auto Clam as an example.
It is actually quite simple to set up your heat press. First, you will want to open the box. Take out your warranty information and power cord.
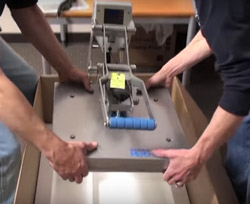
Next, you can take out the top packaging foam piece. You may need an extra set of hands to lift the heat press out of the box. Be careful not to strain your back.

Place the press on a sturdy counter top, table, Heat Press Caddie, or Equipment Cart.

Plug the power cord into the back of the heat press and then the other end into the wall outlet.

Remove the shipping bolt on top of the heat press (attached with a label).

Open the heat press before turning it on.

Turn on the power switch located on the side of the heat press control panel.

The control panel should light up.

Watch these instructions as a video
To set the temperature, time, and pressure
Temperature, time and pressure are the key ingredients to a successful heat application. Set the temperature that you need to apply your transfer using the “Mode” button, and then the + or – buttons to increase or decrease the temperature.
Push the Mode button again to set the first timer. Choose your time, and then push Mode to set the second timer. Pushing Mode again will set your controls.
To set your pressure, lock down the heat press to see what pressure is reading. Turn the knob clockwise to increase the pressure, and counterclockwise to decrease the pressure. Make sure you have the pressure set that is specified by the transfer type. Depending on the apparel you are pressing, you may need to adjust it while the apparel is actually on the press.
[Related Infographic: Heat Applied Transfer Application Tips]

Begin Printing
Once the press heats up to the specified temperature, you are ready to begin heat printing. Before you start printing, however, lock down the heat press for about 30 seconds to heat up the lower platen. You will only need to do this before you begin heat printing each day, or if you leave your press for an extended period of time and the lower platen cools.
If you ever need help, we have plenty of resources to help you in your new apparel business – anything from how to position transfers on a t-shirt, to how to market your t-shirt business. We are here for you every step of the way. Don’t hesitate to call our dealer services department with any questions.