How to Upload Artwork for Custom Heat Applied Transfers
When you have your own artwork you would like to be printed as custom screen printed transfers or custom digital transfers, you can upload the artwork to our site.
There are two different ways you can upload your artwork to order your transfers; through our Upload Portal (or the “upload page” as we commonly refer to it as) or Easy View® Design Center (our online designer). Both ways are quick and easy.
First, we’ll go through the actual steps on how to upload your art for each method, and then we’ll go over when you would want to use each method.
How to Upload Artwork on the Upload Portal Page
First, go to our upload page, TransferExpress.com/upload. In order to upload artwork, you must log into your account.
If you don’t yet have an account, you can easily create an account within a few minutes.
After you are logged in, you will be ready to order your own custom artwork as heat transfers.
The upload page will walk you through step-by-step in a “wizard” format to order your heat applied transfers using your own custom artwork.
Step 1: Print Method
First, choose a print method to get started.
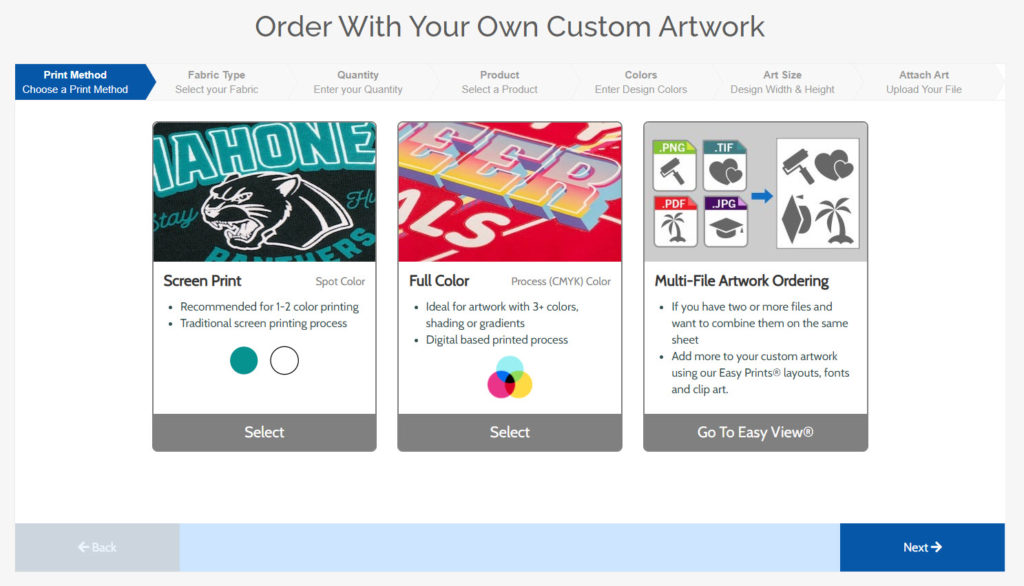
Do you want screen printed transfers or full color transfers?
Screen printed transfers are great if you want 1 or 2 colors. When you have 3 or more colors, it is more economical to get full color transfers.
However, if you have more than 2 colors, you can still choose to get screen printed transfers if that’s what you prefer.
If you choose Screen Print, you’ll then need to enter how many colors you want printed.

Choose full color transfers if you have lots of colors, shading or gradients, or other photographic elements in your artwork. These are printed using the CMYK color mode.
The third option in this first step is using Easy View, our online design center. Choose this option if you have multiple images in separate files that you would like to order on the same transfer sheet.
You can also use Easy View to add extra text or clip art to your existing artwork.
Click the blue Next button in the lower right corner to continue.
Step 2: Fabric Type
The next step is to choose which fabric type you will be applying your transfers to.

This is to help recommend a transfer type for you.
Your options are:
- 100% Cotton
- 100% Polyester
- 50/50 Cotton/Poly Blend
- Nylon
- Sublimation
- Other
For this example, we’ll choose 100% cotton.
After choosing a fabric type, you’ll automatically be advanced to the next step.
Note: If choosing “other”, you will then be asked to input the fabric you will be applying to. However, we won’t be able to recommend a transfer type via the upload wizard.
Step 3: Quantity
After choosing your fabric type, next you’ll enter a quantity.
This is the number of images you need of your artwork.

After entering the quantity, click Next.
Step 4: Product
In this step, you’ll choose a transfer type. Based on your answers above, we’ll recommend a transfer type for you.
A red banner indicates the recommended transfer, but you can choose a different transfer type if you would like something special, like Glitter, Puff, etc.

Clicking one of the transfer types will automatically move you to the next step in the upload wizard.
Step 5: Colors
In this step, you’ll choose the colors you would like your transfers printed as.
If you chose screen printed transfers as your print method, then there will be a color swatch to choose for the number of colors you chose in step 1.

You can always add or remove colors in this step as well.
To choose your colors, click each color swatch to select your color.
If you want to enter your own custom color, you can do so in the Pantone field. Enter the PMS color and it will give you a preview swatch.
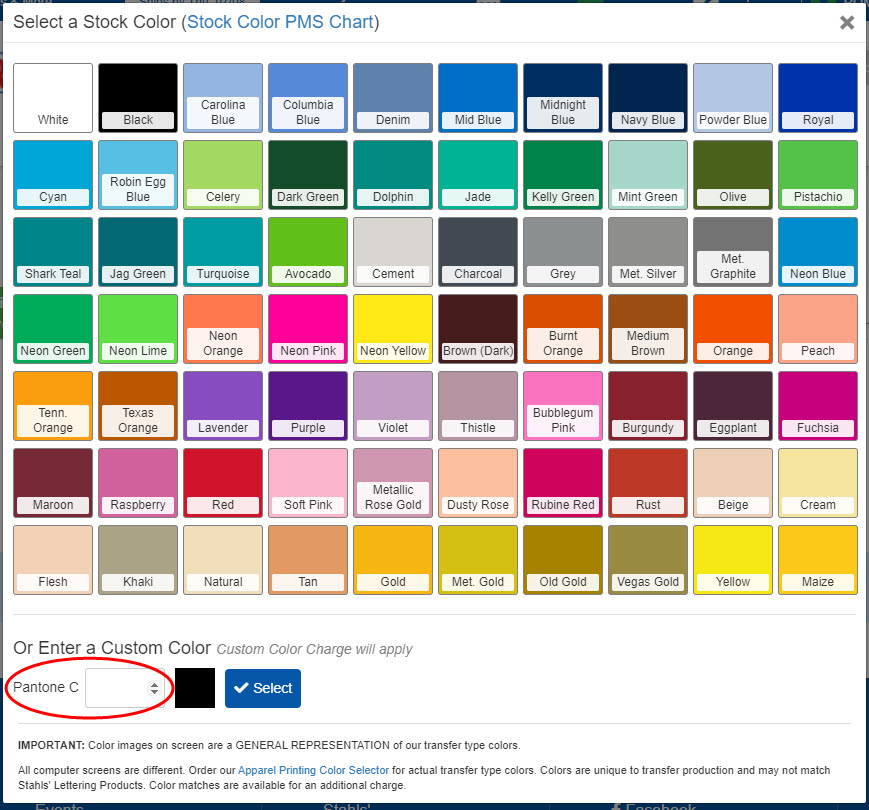
After your colors are selected, click Next.
Step 6: Art Size
This next step will ask for your design size. First, specify if your uploaded artwork is a single image only, or if you have multiple images in the same file, by clicking the button that describes your artwork.

After you choose whether your artwork is a single image or a gang sheet, then you’ll be asked for the actual height and width of your art.
If you are uploading a single image and it’s a smaller size that will fit multiple on a sheet, the wizard will let you know on the bottom blue bar.

Click Next to go to the final step.
Step 7: Attach Art
The final step in the upload page wizard is to upload your artwork file.

We accept 11 file types, including .AI, .JPE, .JPEG, .JPG, .PDF, .PNG, .PSD, .SVG, .TIF, .TIFF, .TXT.
To attach your file for upload, you can either drag your file into the rectangle with the dotted line, or click in the box to select your file.
After you have successfully attached your art file, you will need to give your artwork a quick descriptive name in the text field titled “Artwork Description”. This just helps identifying your upload from your other uploads quickly and search for it later in your order history.
An example of a descriptive name might be: “red Cardinals baseball logo”.
The last field, “Notes”, is optional. This is the place to include anything that we may need to know in order to complete and print your transfer order.
If your artwork file contains different colors than the colors you actually want it printed in, please add instructions in the notes area.
For example, if the artwork was created in black and white colors, but you want it printed in red and yellow instead, choose the red and yellow for the ink colors in the swatches, and then you can add in the notes: black = red ink; white = yellow ink.
You can also include color changes, cut service requests, etc.
Once you have everything filled out, you’ll be able to add your own custom uploaded artwork to the cart as a transfer order.
Just click the Add to Cart button.
Then you’ll be automatically redirected to your shopping cart. You can then complete your transfer order by continuing through the cart and checkout process.
Choose your payment and shipping methods.
After your order is placed, you’ll receive an order confirmation email.

How to Upload Artwork on Easy View
The other method for supplying your own artwork file is to upload it in our online designer, Easy View.
In order to log in to Easy View, you will need to have an active account. Easy View is a free design tool we offer for all active customers. There is no monthly fee to use Easy View.
[Sign up now and try Easy View]
Once you log in to Easy View, you will be prompted with the “Get Started” screen.
To upload your art file, choose the “Add Your Artwork” option.
Easy View only accepts the following file types: .ai, .pdf, .svg, .jpg, .jpeg, .png, .tif, .tiff, .psd.
If you have a vector CorelDraw (.cdr) or .eps file, you will need to convert it to a .pdf file to upload it to Easy View.
Click the “Browse” button to select your art file to upload.
Once your file is imported into Easy View, you will need to adjust your colors.
For Bitmap Files and Screen Printed Transfer Types
If you imported a .jpg, .jpeg, .png, .tif, or .tiff file, and you want it printed as a screen printed transfer, you will have the option to use the Image Editor tool to remove any background box you don’t want.
This will also convert your art to “vector” so you can choose your exact ink colors in Easy View and you will be able to see the changes.
[Related Content: Guide to Using the Image Editor in Easy View]

However, there may be occasions that your image is too complex for the Image Editor to vectorize. When this is the case, you’ll just need to use the “Color Map” option instead of the Image Editor.
Color mapping simply means letting us know what colors of your image you want printed.
The color map option should open automatically, but you can also choose this option from the left hand side of the tool bar.
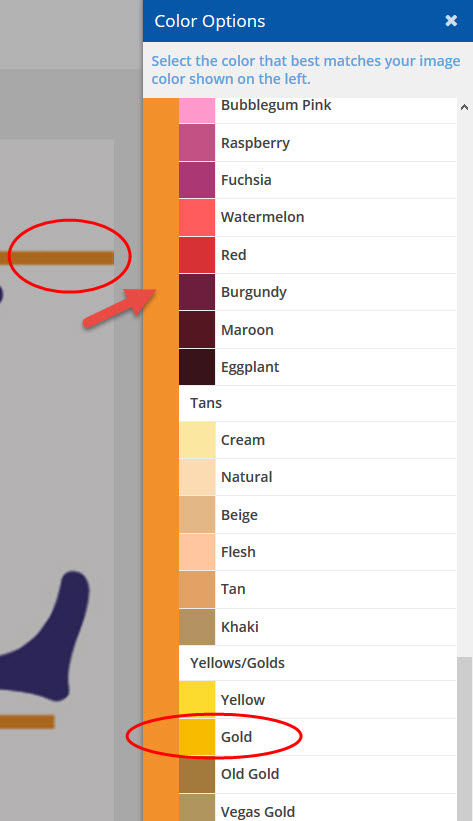
For each color you want printed, you will need to click the color in your design and then choose an ink color that corresponds with the color in the image.
For this example, the logo has 2 colors I want to print. I click on each color in my image, and then choose the ink color that I want printed. The color that you click on in your image shows up in the long, vertical color bar to the left of the ink color options (shown with the arrow below). That way you know which color you clicked on in your image.
So first I choose the royal ink.
And then I choose the gold ink.
After I am satisfied with my color selection, I can click the “back” button at the bottom of the panel.
Again, you only need to use the “Color Map” if you upload a bitmap file (.jpg, .jpeg, .png, .tif, or .tiff), want screen printed transfers, and your image is too complex for the Image Editor to vectorize your artwork.
For Vector Files and Screen Printed Transfer Types
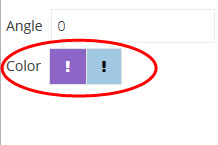
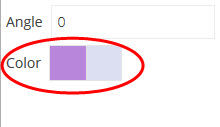
When uploading .pdf files containing only vector artwork, you will simply click on the color swatches on the left hand side that your artwork contains, and then click on one of our corresponding ink colors for each.
Any color swatch that contains an exclamation point will need to have one of our ink colors chosen.
Keep in mind, that the ink colors on the screen do not always accurately represent the actual printed ink color. This is due to RGB/spot color conversions along with computer monitors and calibration.
To accurately choose your ink colors as they will be printed, you can use one of our Ink Color Selector swatch books.
For Any File Type and Digital Transfer Types
If you upload a bitmap file or vector file but you want it printed digitally as an UltraColor transfer or CAD-PRINTZ non-apparel product, then it will be printed as is, and you will not need to select any colors.
If the Image Editor opens after you upload your file, simply choose “Use Original”.
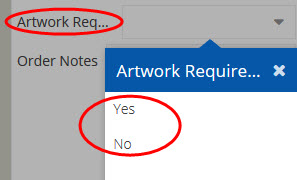
However, you will need to let us know if the artwork requires any modification on the right side tool bar:
Finish Your Order Details
No matter which file type you have uploaded or transfer type you have chosen, after you have your colors selected, you need to fill out the rest of the order information just as you normally would in Easy View, such as the print method, transfer type, fabric, fabric color, and quantity.
There is also an “Order Notes” section that you can add any additional notes that we may need to know for the order.
Easy View will also give you the total price for the order.
When to Use the Upload Portal Vs. Easy View to Upload Your Artwork
So in the end, why are there two different ways to upload your artwork?
And more importantly, when do you want to use each method?
Each method has its own purpose with several factors. Here’s how to choose which method you will want to use.
When to Use the Upload Page
If you want more of a hands-off approach to the artwork, you can upload the file to the Upload Page.
What do I mean by this?
When you upload your image or artwork, you can’t work on the artwork anymore. Any changes you want to the art have to be added to the notes.
If you don’t want to mess with changing image sizes, changing ink colors, etc., then you can communicate it with us and our designers will take care of it for you.
Note: If there are a lot of notes and/or changes, you may want to first order a proof to make sure the changes were accurately translated to our designers.
If you’re the type of person that just wants our designers to take care of it for you, then the Upload Page may be for you.
Another reason you may want to use the Upload Page, is when your art file is exactly the way you want it.
For example, maybe you, or whoever supplied the art file to you, set up the page so that all your images are already set up for your gang sheet. Or maybe your colors and sizes are all correct.
Your art file is ready to order your transfers as is.
These are the times that using the Upload Page would work to your advantage.
When to Use Easy View to Upload Your Art
There are times when using Easy View may be the route for uploading your artwork.
The main purpose for uploading your artwork to Easy View is when you want that hands-on approach to your order.
Maybe you have a lot of changes to your artwork that you would like to handle on your own.
You can upload your art file, remove the background, then change the colors you want, change the image size, and even create your own gang sheet, if multiple images can fit on the transfer paper.
You can also upload multiple files/images and fit them all on the same order.
Maybe you want to upload part of an image, but then add it to an Easy Prints® layout. Then you can combine your artwork with our clip art and layouts. Maybe you want to add another line of text.
Easy View allows you to be in control. You have much more control over your uploaded artwork in Easy View if you want to see these changes exactly how you want them to be.
If you’re the type of person that wants to get in there and nudge all your artwork around, then Easy View is perfect for you.
Conclusion
There are two ways to upload your own artwork to our site so it can be made into custom heat applied transfers.
Each way, whether it is via the Upload Page on our site or through our online design center, Easy View, is easy and quick to send us your artwork you want printed.
They both require the same amount of ordering details. They both give you your price.
The difference is whether you to what extent that you want to be hands-on or hands-off with the artwork.
It’s all up to you and the level you are comfortable with.
In the end, they will both get you your custom heat applied transfers printed with your own art!


