The newest feature in Easy View® is the Image Editor.
When you upload your own piece of raster artwork (jpg, tif, etc.) into Easy View, it will automatically open the Image Editor.
This new tool will help to adjust and prepare your raster art for screen printed transfers.
It has some cool features that customers have asked for, so we’re excited to add this editor to Easy View.
Let’s dive in to how it works and what you can do with it.
Uploading Your Own Artwork into Easy View
When you click “Add Your Artwork” within Easy View, you can import your own clip art or entire t-shirt design.
If your artwork is not already vector, then it will open in the Image Editor.
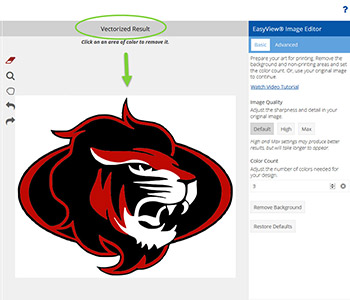
The first thing that the Image Editor will do is vectorize your artwork for you!
This will allow you to edit your image further, such as remove the background box and change your colors.
Your original image is on the left side with no changes, and a preview of your new vectorized result will be on the right side.
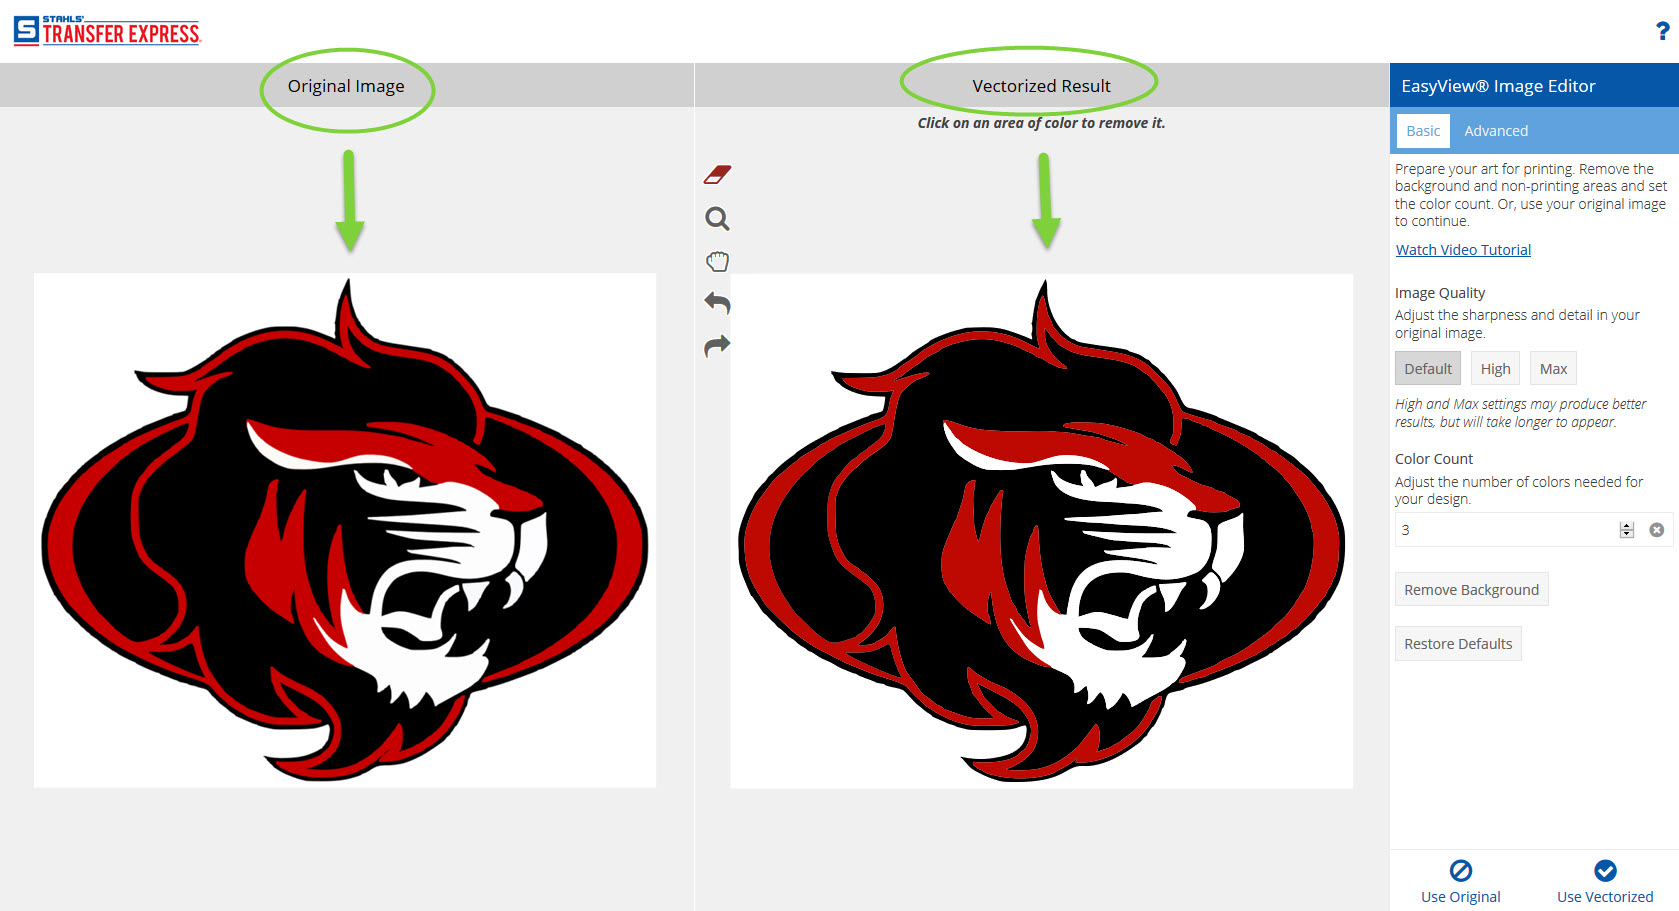
Depending on the quality of your original bitmap image that you uploaded and the amount of detail in the art, the default settings will work most of the time, especially if your artwork has sharp lines, contrasting colors, and no shading.

If you are not completely satisfied with the result from the default settings, you can click on the High or Max buttons to try to improve the vector result of your art.
The High and Max buttons increase the number of pixels in your original art, which provides more information for the Image Editor to work with during the vectorization process, which can improve the vector result if your image has a lower image resolution, or more complex details.
Using the Color Count Option
Another option to achieve your desired result of the vectorized art is the Color Count field.

You can choose to increase or decrease the amount of colors in your artwork. Using this option will try to force your artwork to the amount of colors you choose.
Changing the amount of colors in this field can result in an increase or decrease in the level of detail in your art.
However, if you are just trying to change or choose the colors of your artwork, we recommend using Easy View to change the colors (in the next step), as it will give you more control over the colors used in your art and won’t take away any detail that you wish to keep.
For example, if your original image has 3 colors and you wish to make it 2 colors, it may be better to keep it at 3 colors in the Image Editor and then make one of the colors show through in Easy View, to make it 2 colors.
So now that your art is vectorized, you can edit your image further.
Remove the Background from Your Artwork
You can easily remove the background of your image by clicking the “Remove Background” button in the Image Editor.

That’s it! One easy button.
In some cases, there might be extra pieces of the background within your image that were not removed.
If you want to remove them, just click on the areas you want to remove using the Eraser tool.

For a majority of the artwork added, this will complete what you need to do in the Image Editor. If you are satisfied with the vectorization result, just click the “Use Vectorized” button in the bottom right corner to continue designing in Easy View.

Restore Defaults to Restart
If at any time during the vectorization process you don’t like the results, or you removed too many pieces, or clicked too many buttons (hey it’s ok, we can all get a little click-happy at times 😬), you can always choose to click the “Restore Defaults” button to go back to the default vectorization using the default settings.

The Advanced Tab
At the top of the right side tools panel, there are additional options in the “Advanced” tab.

These options are for experienced or advanced users to further refine your artwork.
There are pre-defined color palettes to choose from, which acts similar to the Color Count field in the “Basic” tab.

Choosing more or less colors can increase or decrease the level of detail in your image.
The adjustment sliders in the Advanced Tools section below the color palettes are similar to the sliders you might find in other illustrating software programs.
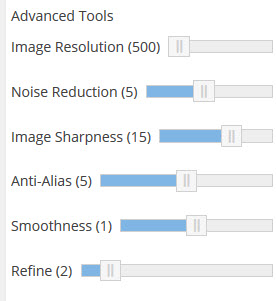
To use these sliders effectively will require a little more experience in using these types of tools.
Here is a quick description for each adjustment slider.
Image Resolution: Scales up the resolution of original image so more detail is available before vectorization
Noise Reduction: Removes noise from low quality images before vectorization
Image Sharpness: sharpens original image before vectorization
Anti-Alias: removes unwanted blobs from vectorized result
Smoothness: adjusts the smoothness of lines in the vectorized result
Each description is also available when you hover over the slider.

Most images will not require using these adjustment sliders, so if you feel intimidated by these tools, you most likely will not even need to click on the “Advanced” tab.
The tools in the “Basic” tab will suffice just fine for a majority of uploaded artwork.
Choosing Your Ink Colors in Easy View
Once you click on “Use Vectorized”, you will then proceed to the normal Easy View design center screen where you will be able to choose your print method, transfer type, and your ink colors for your design.
However, if you chose to “Use Original”, then you will be taken to the Color Mapping screen to choose your ink colors.
If you chose to vectorize your raster art in the Image Editor by clicking on “Use Vectorized”, you now have the ability to choose and change your ink colors that you want your art printed in.
Just like when you import vector artwork into Easy View, your color swatches on the left side will have exclamation points (!) over your colors.
This signifies that you still have to match the colors in your artwork with ink colors for printing.

Click on each swatch to choose the stock transfer ink color you want printed.
If you have a custom color that you want to color match, you can choose “Custom Color” on the bottom of the colors panel.

On the other hand, if you didn’t choose to use the vectorized version and clicked on “Use Original” in the Image Editor, then you can still choose your colors using the Color Map option.
Use this option if you still want your image created as a screen printed transfer.
If you know you are going to use a full color transfer option, then you can just click “Done” at the bottom of the Color Map panel.
When to Use Your Original Image
There are a few instances that you will want to use your original image instead of the vectorized version.
Some art files will not work well in the Image Editor for vectorization.
Artwork with small details, gradients, or low image quality may not vectorize as well.
But that’s ok, because you still have the option to use your own original artwork that you uploaded.
In these instances, our in-house designers will prepare it for printing and make any needed changes for you.
If you are getting your artwork printed in a full color transfer option, then there is no need to vectorize it, especially if you don’t want to make any changes to your image. In this case, you can also choose to “Use Original”.
Artwork that contains photographic elements will print better as full color transfers, so you can choose “Use Original” in these cases as well. An example of this would be a photo of your family for your family reunion shirts.
Finishing Up Your Design in Easy View
From there, you can upload more of your own artwork or add Easy Prints clip art or layouts as well.


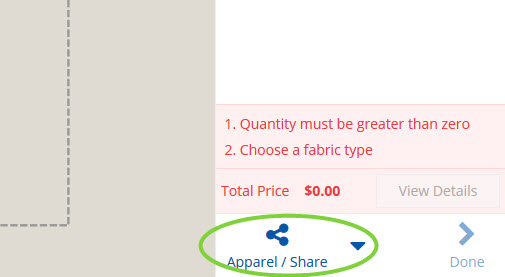
When you are finished with your design, click the Apparel/Share button in the bottom right corner to preview your design on apparel.
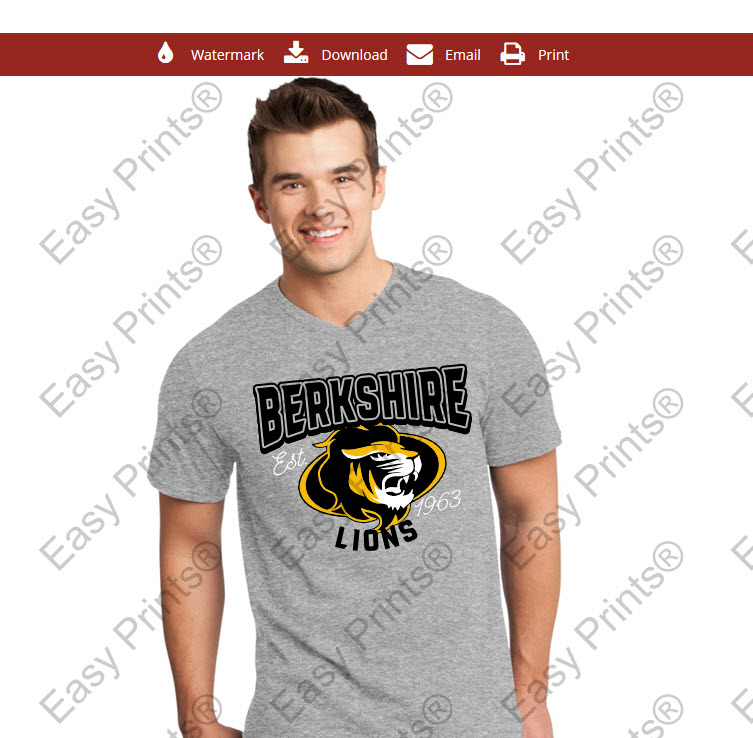
When you are ready, you can finish filling out the quantity and place your order.
Happy designing!
If you haven’t tried Easy View yet, you can sign up for a free account to start designing now!

Can I purchase the design I created, and you all send it to me through a png file to my email? I do not want to purchase the sheets. Only the design is that possible?
I’m so sorry we are a transfer manufacturer so the design center is used only for creating designs where you will order the transfer from us. We don’t sell just our art.