
Looking for a quick way to use the Easy View® designer? If you just want to change out the colors, clip art, and words in an Easy Prints layout; this picture-by-picture tutorial can show you how!
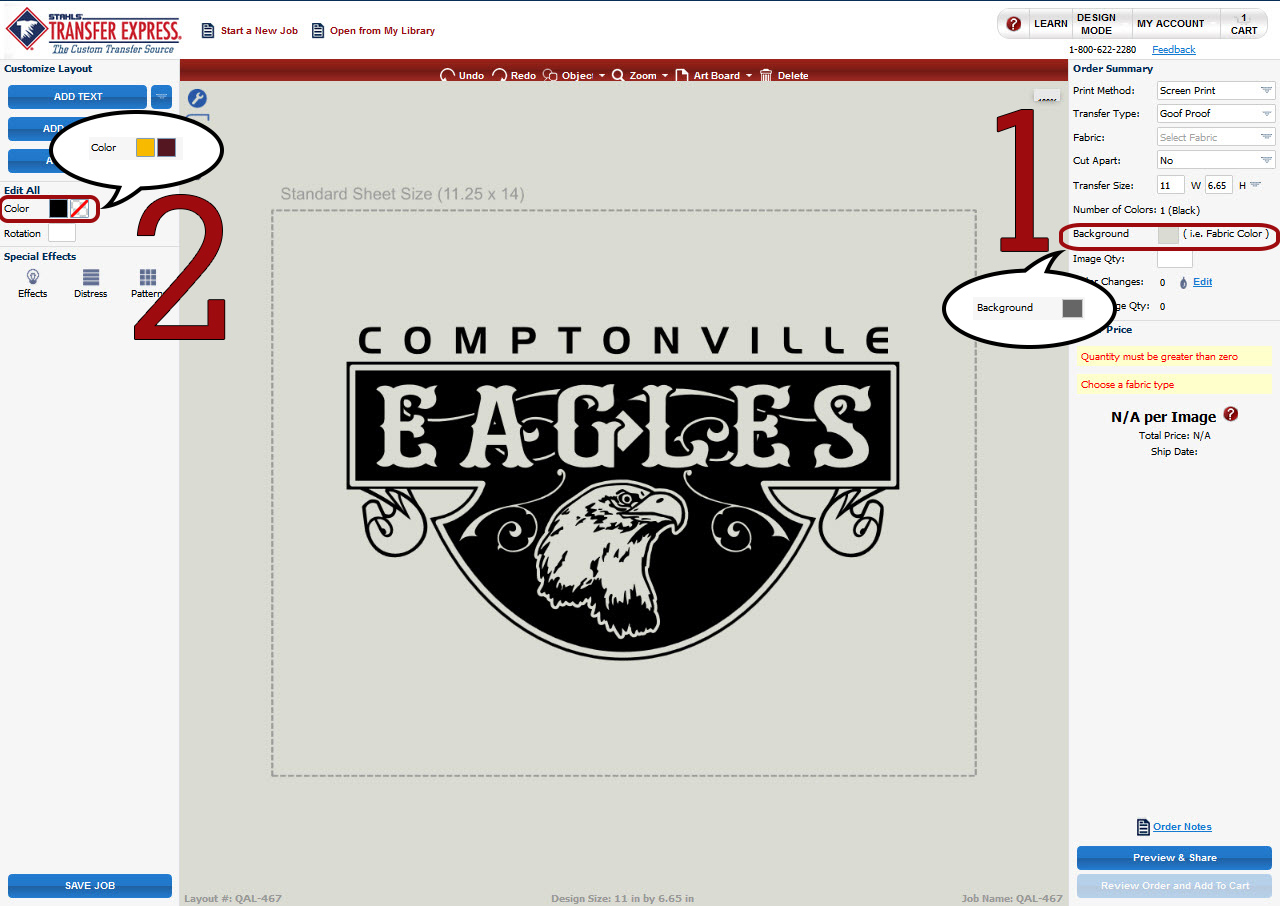
To change the colors in your design; make sure that nothing is selected. If something is selected; simply click on the gray background to deselect. First, change the background/fabric color by clicking in the box that shows the current color and choosing the color that you would like from the color box that appears (1 in the image below). After you have changed the background color, change the ink colors by doing the same process but with the current ink colors (2 in the image below).

To change the clip art, click on it, this will select it. A green box should appear around the clip art, such as in the image below. Once the clip art is selected, choose the “swap” button to change it to an image that you would prefer in your customized design. Choose the clip art from one of the Easy Prints categories or type the clip art number in the search box if you know the clip art’s unique identification number.

To change the words in the layout, simply double click the word that you want to change. When you do this, a dialogue box will pop up. Erase the word that is currently in the box and type the word that you would like to change it to.

When the design looks the way that you want it to print, choose your transfers type, the fabric type that you are heat pressing it to, and the quantity that you would like.

When you’re ready to order, choose Review Order and Add To Cart (1). You will notice that Easy View automatically gangs your image into multiple per sheet if there is enough room for more than one image to a sheet. This helps you save money on transfer sheets. In this case; though you ordered 50 transfers, you only need 25 transfer sheets since two transfer images can fit to a transfer sheet. When you are ready to add the order to your cart, choose the Add to Cart button (2).

A box will pop up that says that your order has been successfully added to the cart (1). Before checking your cart, save your art with the Save Job button in the lower left hand corner (2). You will lose any unsaved work when you leave the screen to go to your cart, so we highly recommend saving. Choose the cart button in the upper right hand corner of your screen to go to your cart and submit your order (3).

In the check boxes, check all of the orders that you would like to place from your cart (1). When all of the transfer designs that you want to order are selected, choose submit order to place your order (2). If a box pops up after submitting, modify your address, etc. as needed to order your custom transfer design.
