Editing Text and Clip Art in Easy View®
One of the basic functions of Easy View® online designer is to easily customize your chosen layout by changing the text, clip art and color to meet your customer’s needs. In just a few clicks, a black and white pre-made layout can become a colorful piece of custom artwork that is just what your customer is looking for.
First, choose the layout you’d like to start with. If you’re not sure how to choose a layout, view our post Finding Your Layouts and Clip Art in Easy View.
Once you click on the design you want to use, it will automatically be shown on the art board in the Easy View designer.
Changing the Apparel Color and Ink Color
If you know the color of apparel your customer has chosen, you can adjust the apparel color in the lower left hand section of the designer to get the most accurate representation of the finished design.

By default, the design is shown in black ink but can be changed to the color of ink you’d like printed.
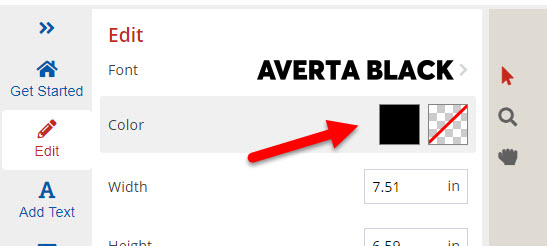
To change the design color, click on the black color swatch located in the “edit” portion of the left toolbar. The stock ink color choices will appear to select the color of your choice. The rest of the design will “show through” to the color of your “Apparel Color” chosen.

Changing Text in Easy View
To change the text lines in the design, simply click on the text. Once selected you can change the text in the left-hand toolbar.

Alternatively, you can also double-click the text and a edit box will appear where you can also change the text. Repeat this step for each line of text you want changed.

Replacing Clip Art in a Layout
Swapping the clip art is just as simple. Click on the clip art in the layout. In the left-hand toolbar, click on “Replace Clip Art”. From here you can browse the different Clip Art categories or Search for a specific clip art using a keyword. Click on the piece of clip art of your choice and it will automatically replace the previous clip art in the layout.

