Tips for Printing on Youth Shirts
If you are an apparel decorator, chances are, you’ll be printing on youth shirts at some point.
While it is slightly different and can throw in some extra nuances, it doesn’t mean you should turn down the job.
In actuality, printing on youth t-shirts is not too difficult.
Let’s take a look at what you’ll need to do differently and how to do it.
Markets for Youth T-Shirts
First, there are plenty of markets for youth t-shirts. If you are printing for any of these types of markets already, you’ll definitely be printing youth apparel as a part of it.
- schools (pre-schools, elementary, middle school)
- youth sports
- family reunions
- youth activities/clubs
- camp t-shirts
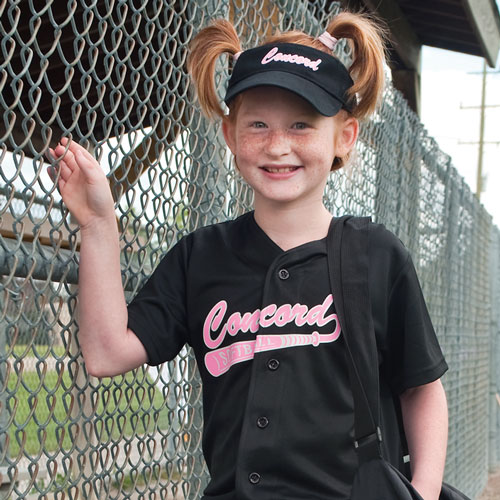
All of these types of orders are usually larger quantities, which makes them very profitable.
With larger quantities, your print costs will decrease. Yes, your selling price may need to be lower for a bulk order, but the profit you make through volume will make up for it.
Design Sizes for Printing Youth Shirts
One of the most common “mistakes” we see when printing youth shirts is the misconception that you need to make a smaller youth size print from the adult size print.
While this is definitely an option, it is not the only option, and it is not always needed.
It depends on the exact group you are printing for and the artwork.
Printing for All Youth Sizes
If you are only printing on youth sizes, you can certainly reduce the design size.
For a full front youth size design, we recommend somewhere around 8-10” wide. A toddler or infant size can even be smaller, around 5-6” wide.
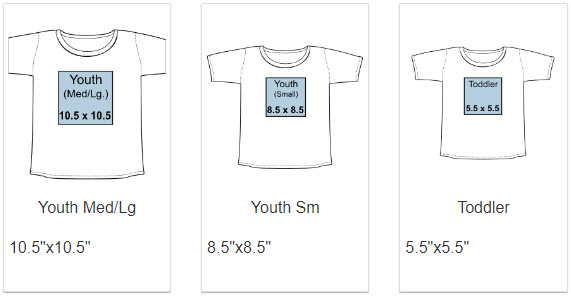
One thing you’ll need to consider when designing at this smaller size is any artwork minimum requirements.
At these smaller sizes, you’ll need to make sure your minimum line thickness is wide enough to print, and your minimum show-through thickness is wide enough not to close up.
[Related Content: How to Use the Line Thickness Tool in Easy View to Check Your Artwork for Requirements]
Try to limit the detail in the design.
Printing for Both Adult and Youth Sizes
On the other hand, if you are printing both adult and youth size shirts in the same order, such as a family reunion for example, you do have a couple options.
Option 1: Same Size Print
You can use the same size print for both the adult and youth sizes. When you go this route, you’ll need to look at the spectrum of sizes, taking the smallest size and the largest size.
For example, you may have a youth small and an adult 2XL.
Next, you’ll design the artwork so that it fits the entire space on the smallest size, in this example the youth small. The design will be a little big on the youth small, and maybe slightly smaller on the adult 2XL, but will not be that noticeable. On a majority of the sizes, though, it will look great.

[Related Content: How to Handle Multiple Shirt Sizes]
This is a great option for customers with a limited budget. The advantage is that you’ll use the same order of transfers to print the entire run of shirts. It will be one order at a higher quantity price break, keeping print costs low.
Option 2: Standard Gang Sheet
Your next option is to try to fit two different sizes of your design on the same transfer sheet.
One of the advantages of screen printed transfers is that you can order as gang sheets. Fit as much as you can onto the sheet, all for the same price. Then, you’ll just cut your images apart and heat apply the individual images as needed.
This method will work great when your artwork is more rectangular in nature. That way, your adult size print will not be taking up too much room and you can fit an additional print on the sheet, one that is slightly smaller for the youth sizes.
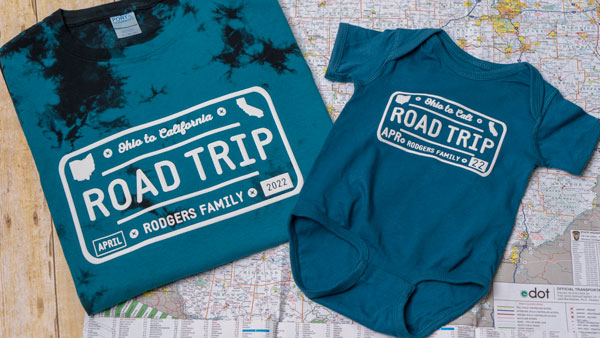
In this case, you’ll still be able to save money because while you won’t need to order as many sheets, you’ll have at least 2 images per sheet, dividing your sheet cost in half for your “per print” cost.
However, if your design size is too large to fit 2 images per sheet, fear not. You still have another option to try to accommodate this method.
Option 3: Jumbo Gang Sheet
For Goof Proof, Hot Split Retro, and Elasti Prints transfer types, a jumbo size transfer sheet is available. For slightly more cost per sheet, you can upgrade your sheet size to 12.5” x 17.5” from the standard sheet size of 11.25” x 14”.
Most of the time, you can fit 2 adult size prints on this jumbo sheet, so you should definitely be able to fit an adult size print and a youth size print.
Using one of these methods, you should be able to avoid placing 2 separate transfer orders, 1 for adult prints and 1 for youth prints.
Other Sizing Considerations
The other thing you’ll want to consider is how many adult size shirts you are printing verses how many youth size shirts you are printing.
If you are printing for a youth sports team, for example, and the entire order is for 15 youth shirts and one adult shirt for the coach, you’ll be best off using our first method above. Size accordingly for the youth shirts and place the same size print on the adult shirt, since most of the shirts are for the youth.
On the contrary, if there is a family reunion and the order consists of 50 adult shirts and only 5 youth, create the print size for the adult shirts but make sure you can still squeeze the print onto the few youth sizes as well.
Name and Number Sizes
When you are printing sports uniforms, you’ll encounter the need for names and numbers.
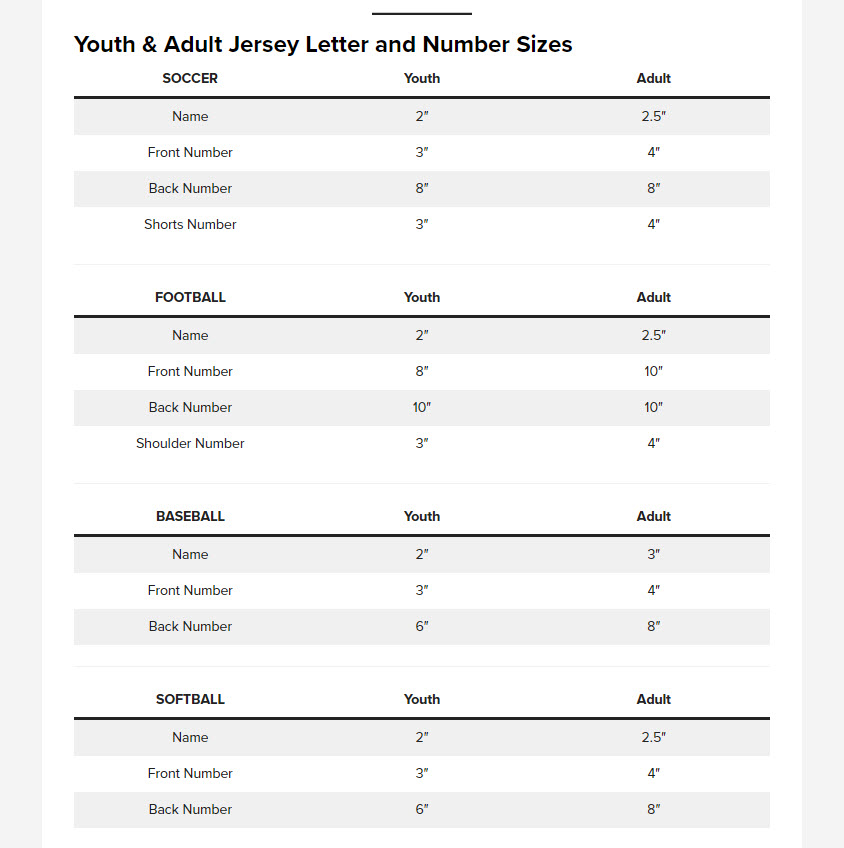
There are a variety of sizes to choose from in both names and numbers. Here is a chart with recommended sizes for youth jerseys, including fronts and backs for various sports.

Print Placement on Youth Shirts
Printing on youth shirts is similar to printing on adult size shirts when it comes to print placement.
You’ll still find your vertical and horizontal placement guidelines.
With the shirt lying flat on your heat press, draw an imaginary line from top to bottom down the middle of the shirt, using the collar, to find your vertical center. Sometimes the inside tag will help find the center, but you can’t always trust that the tag was positioned in the center. You can also use a center point on your heat press as well.
Next, find the horizontal guide by going from one armpit seam across to the other armpit seam under the sleeves.

Depending on your design, whether it’s more portrait or landscape, you’ll use this horizontal guide to know how far down on the shirt to place the image.
For more of a landscape design, place the transfer more towards the upper half of the horizontal guide. For designs with a very small height, you can even place the bottom of the design above the line.
While on an adult size shirt, this would equate to about “3 finger widths” down from the collar.
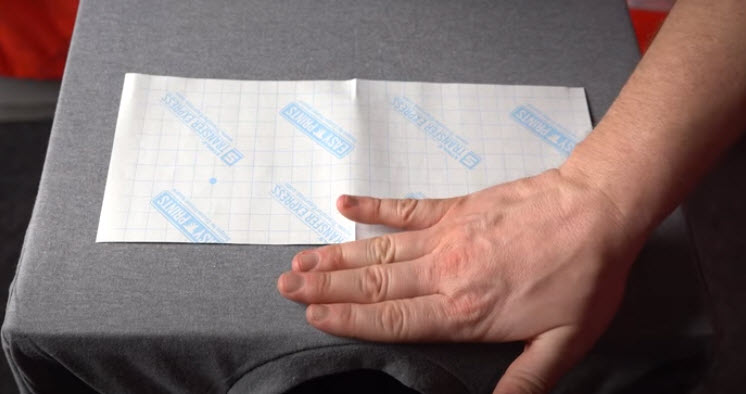
On youth shirts, you’ll probably want to adjust this to about 2 finger widths down from the collar.
[Related Content: Heat Transfer Placement and Position Guide]
Heat Pressing Youth Shirts
With all of the design and placement tips out of the way, let’s move on to how to actually print on youth shirts.
Like printing adult size shirts, you can either “thread” the shirt onto your lower platen, or you can lay the shirt flat on top.
Sometimes it is preference to the operator, but sometimes it is necessary to do one or the other.
[Related Video: Tips For Loading T-Shirts On Your Heat Press]
If you are able, you can lay the shirt right on top of the lower platen. I say “if you are able” because you don’t want seams of the apparel getting in the way of printing. Too large of seams may cause uneven pressure which can prohibit a proper transfer application.
Since youth shirts can be very small compared to a larger size heat press platen, like a 16” x 20” for example, seams from the sleeves could possibly get in the way since they are not hanging over the edges of the platen.
Threading The Heat Press Platen
When laying the shirt on top of the platen won’t work, one option is to try to thread the shirt onto the lower platen.
This will get the fabric down to one layer instead of two. The goal here is to eliminate seams or other obstructions that will cause uneven pressure.
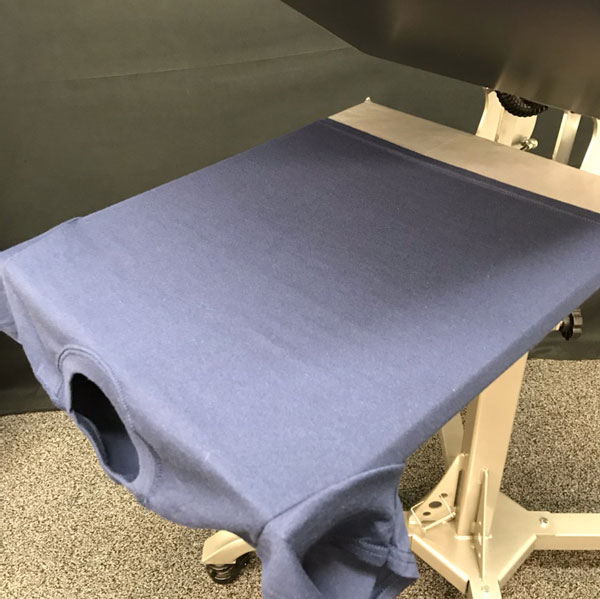
The important thing to keep in mind when threading, or dressing, the lower platen is to have the right size platen. The issue you may run into when printing on youth shirts is too large of a platen.
Youth mediums and larges will usually fit on a regular size heat press platen. However, youth smalls will usually be too tight.
Too large of a platen combined with too small of a shirt can stretch the shirt out. Not only will this potentially ruin the shirt itself, but when you print on a stretched-out shirt, it will distort or skew the print when it is taken off the press.
There are a couple solutions to this problem.
Interchangeable Heat Press Platens
If you have a heat press that supports interchangeable platens, you can size down to a smaller platen. Hotronix Fusions, Auto Clams, and Maxx heat presses are all capable of interchangeable platens.
The 11”x15” platen or 8″x10″ platen will work great for youth size shirts. The smaller platen allows you to thread a smaller shirt onto the platen without stretching the shirt.
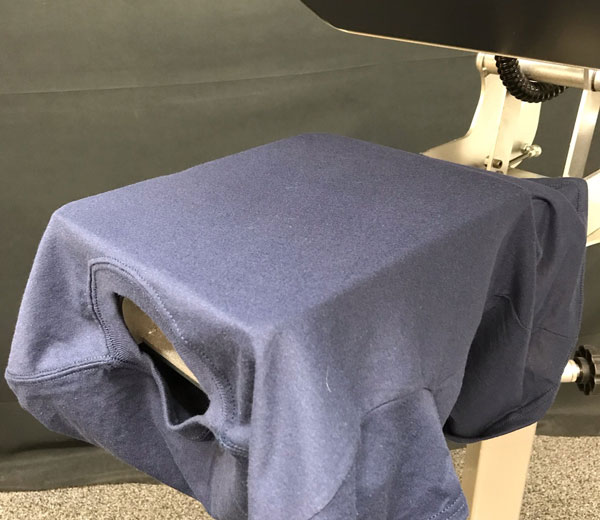
For even smaller apparel items like baby onesies, there are various sizes for smaller platens, such as a 6” x 10” or a 4” x 4”.
Not everyone has a large 16” x 20” size heat press, either. If you already have a smaller press, you are set to go. One that is threadable would give you even more options as well.
Printing Pads
If your design size is smaller than 8” x 10”, you can also go the route of a Print Perfect Pad. This Print Perfect Pad provides a firm printing surface just like the pad on your heat press.

This is not a pillow.
This will help raise your print area away from seams and other obstructions that may be in the way, like buttons on baby onesies.
To print on apparel with the Print Perfect Pad, simply slide it inside of the shirt and then place in your heat press for application.
Or, you may be able to lay the shirt right on top of the pad itself, on the platen.
If you are printing on smaller apparel like a baby onesie, you can even use a mouse pad. Mouse pads are similar to Print Perfect Pads and provide a firm printing surface.
The benefit to a mouse pad is that they are inexpensive, and you can cut them up to fit inside any smaller apparel you may be trying to print.
[Related Content: Heat Printing Infant and Toddler Apparel]
Transfer Materials for Printing Youth Apparel
One last thing to keep in mind when printing on youth shirts is that there are certain guidelines that you must follow.
The CPSIA (Consumer Product Safety Improvement Act) is a law that regulates items made for children to comply with certain safety standards in the U.S. and the materials they are made of. This would include youth apparel and the printing of the apparel.
You can find the CPSIA certificates for our transfer products on each of the transfer type pages on our website. Our transfers are made with Phthalate-free plastisol inks.
