
For this blog post, I gave myself the challenge of completely filling a custom transfer gang sheet and using the whole sheet to complete a custom, fully decorated outfit.
The first step in completing this challenge was to order the garments so that I could determine the size of each transfer design. Once I had the garments, I measured each section where I thought a screen printed transfer design might look good.
The next step was to create my designs in the Easy View designer. In the designer, I used layouts QSO-154 and QLG-20 along with a lot of text and clip art. I adjusted the sizes of the main layouts that I wanted in the designer and then added extra text and clip art in the space that I had left.

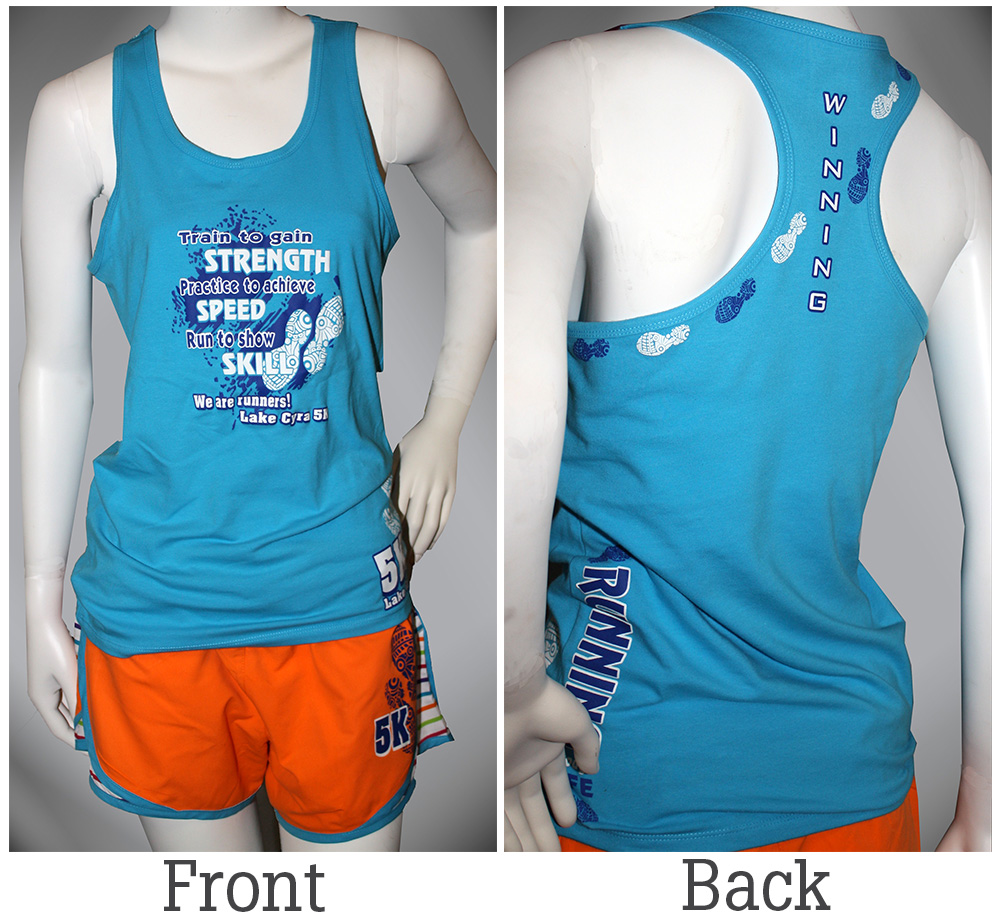
Once I received my screen printed transfer gang sheet, I cut each individual design and piece out. I ordered Goof Proof transfers, so I applied each at 365 degrees for 4 seconds. The first part that I applied was the main design on the front with the 5K runner motivational saying that I came up with, using layout QSO-154. This applied really easily as one piece.

When I had received the garment, I was really excited about the thin space at the top of the tank top, on the back side because I thought that would be the perfect spot to write “winning.” I did this part next. Since I had fit several small shoe clip art on the transfer sheet, I thought this would look great with the “winning” text. For this spot of the apparel, I laid down each transfer and heat pressed and peeled them all at the same time.

For the next part, I heat applied the second layout that I used, layout QLG-20. I used this layout on the back of the t-shirt, close the bottom and near the seam. This was a quick addition because all of the pieces were already together as a layout. I only put the part of the t-shirt where I wanted the design on the platen. But if part of the already pressed design had ended up on the platen I would have had to use a cover sheet over the design so that the ink would not have transferred to the top of the heat press.

I then moved on to the bottom front of the t-shirt, where I used two pieces of text and one clip art to create my own custom design. This was all extra that I had placed of the transfer so they started as separate pieces. Since they were separate, I had to apply them individually. First, I applied the shoe clip art. Once that was applied, I thought that the 5K and name of the event text would look great on top of it. I placed both pieces of text where I wanted them on top of the clip art, placed a cover sheet over the whole thing, heat pressed, and peeled the backings to turn three pieces into one design.

At this point, there was only a piece of text and clip art left. Again, I applied them as two pieces, and heat pressed them to the shorts to complete the full runner’s 5K ensemble.

What is the moral of my challenge? Don’t waste that extra space on your transfers. If there is extra space and you don’t mind cutting between designs, use that space. These extra pieces of art could help you create things that you had not originally planned on and allow you to either super customize your garment, as I did here, or create add-ons that you weren’t even expecting such as scarves, hats, mouse pads, or gloves. One transfer can make many designs!
